Import a Subscription and Connect with Shadowrocket
Using the iPhone and iPad interface, add a server, choose a mode, connect, and verify the result. First confirm that an existing connection works, then check rules and automatic connection conditions.
Import details → Confirm routing → Verify results
Add Server: Add a Server or Import a Subscription
First identify whether you have details for a single server, a QR code, or an updateable subscription address. Use the matching method below.
Have a subscription link? Choose Subscribe
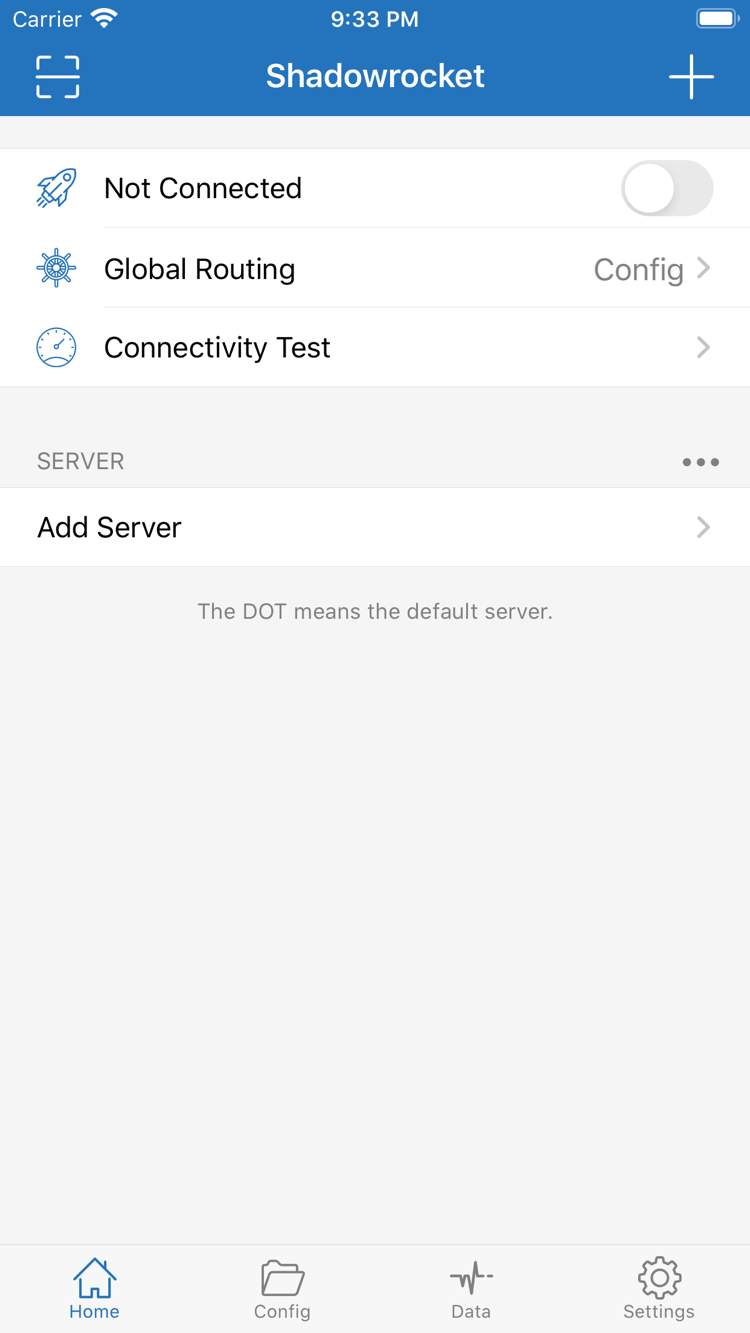
Open Home in Shadowrocket, find Add Server in the SERVER section, and open the add screen. Tap Type, choose Subscribe, and paste your complete subscription address into the corresponding address field. Before saving, check the entire address from beginning to end, especially for spaces, line breaks, or explanatory text included during copying. A subscription address may contain credentials. Do not alter characters that look random or use an ordinary webpage URL as a subscription link.
When finished, tap the save button in the upper-right corner, return to Home, and use the update action for that subscription. After a successful update, the SERVER list should show server entries parsed from the subscription. The subscription name is only a group or update entry; it does not mean that a usable server is selected. Select a specific entry from the expanded list next. If the list is empty after saving, first check whether the address is complete, whether the current network can retrieve the subscription, and whether the subscription is still valid. Do not immediately add the same address repeatedly.
Have details for a single server? Fill in the fields for its Type
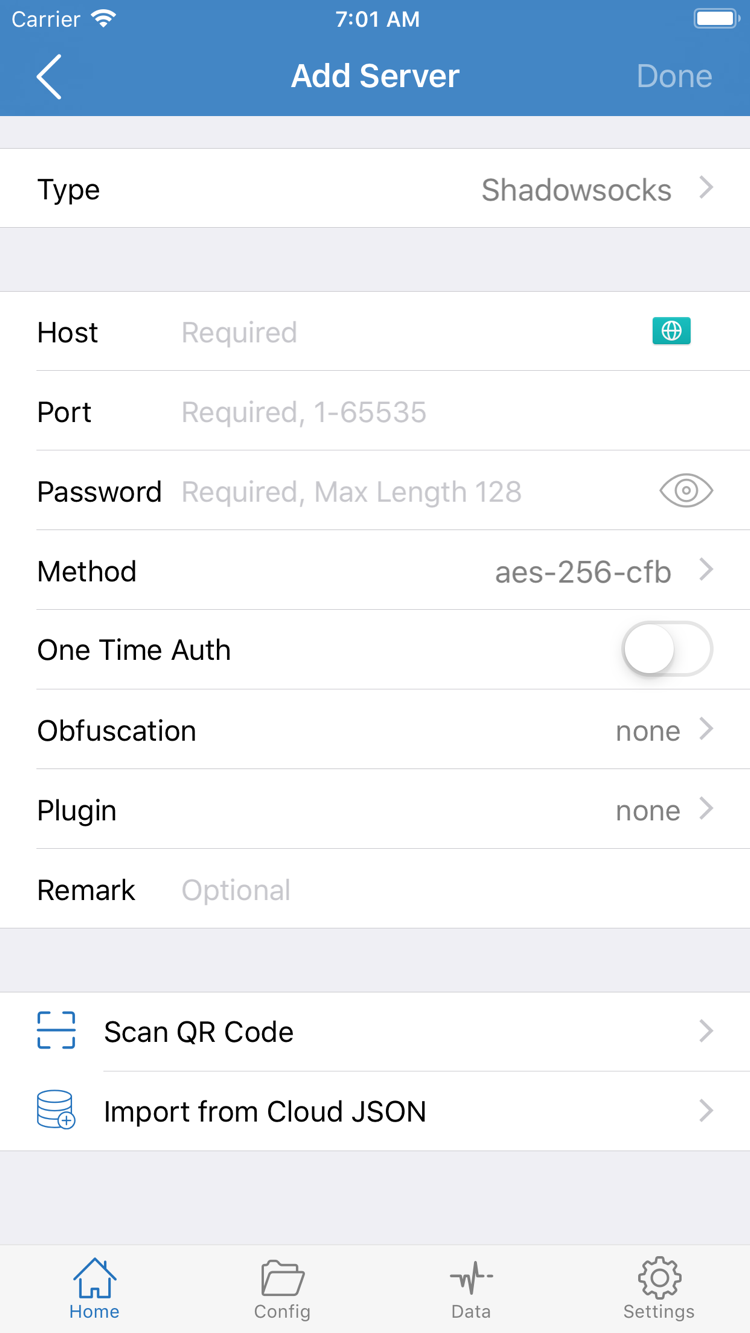
If you have a server address, port, and authentication details, choose the matching Type in Add Server. The fields differ by protocol, so do not assume that types are interchangeable just because they all have Host and Port fields. For example, with Shadowsocks, enter the server address in Host, the specified server port in Port, and values matching the server in Password and Method. Do not add a webpage path to Host or enter the server's display name in the address field. For other types, fill in each authentication and transport field using the information you already have.
After saving, return to Home and check that the new entry's name and address are as expected. The display name helps identify the entry, but changing it does not change the connection details. If your service provider gives you details for multiple protocols, use one complete set; do not combine the port from one set with authentication fields from another. If you are unsure which Type to choose, check the original configuration instructions before connecting. Avoid masking a field error by repeatedly trying different values.
Have a QR code? Use Scan QR Code
On the Add Server page, you can use Scan QR Code. When the system first asks to use the camera, grant camera permission as prompted. After scanning, review the parsed Type and server fields before saving. The QR code should come from your own configuration details; like a plain-text link, it may contain credentials. Import from Cloud JSON is a separate structured import option, not a place to paste any subscription URL. Once one import method is complete, continue to the next step. There is no need to scan and enter the same server again manually.
Before continuing: A specific server entry appears in Home under SERVER, and you can identify which one you plan to use.
Global Routing: Choose How Traffic Is Handled
The server determines which proxy connection is available; Global Routing determines how traffic is handled. Check both separately.
After importing, return to Home and open Global Routing. If this is your first time, get familiar with the three common modes: Config / Proxy / Direct. Do not judge whether a connection succeeded by the name of the selected mode alone. Choosing a mode only sets how traffic is handled; you still need to select a server and turn on the connection switch. During troubleshooting, note the original mode. Restore it after a temporary test so test settings are not mistaken for your regular configuration.
Config: Follow the selected configuration file
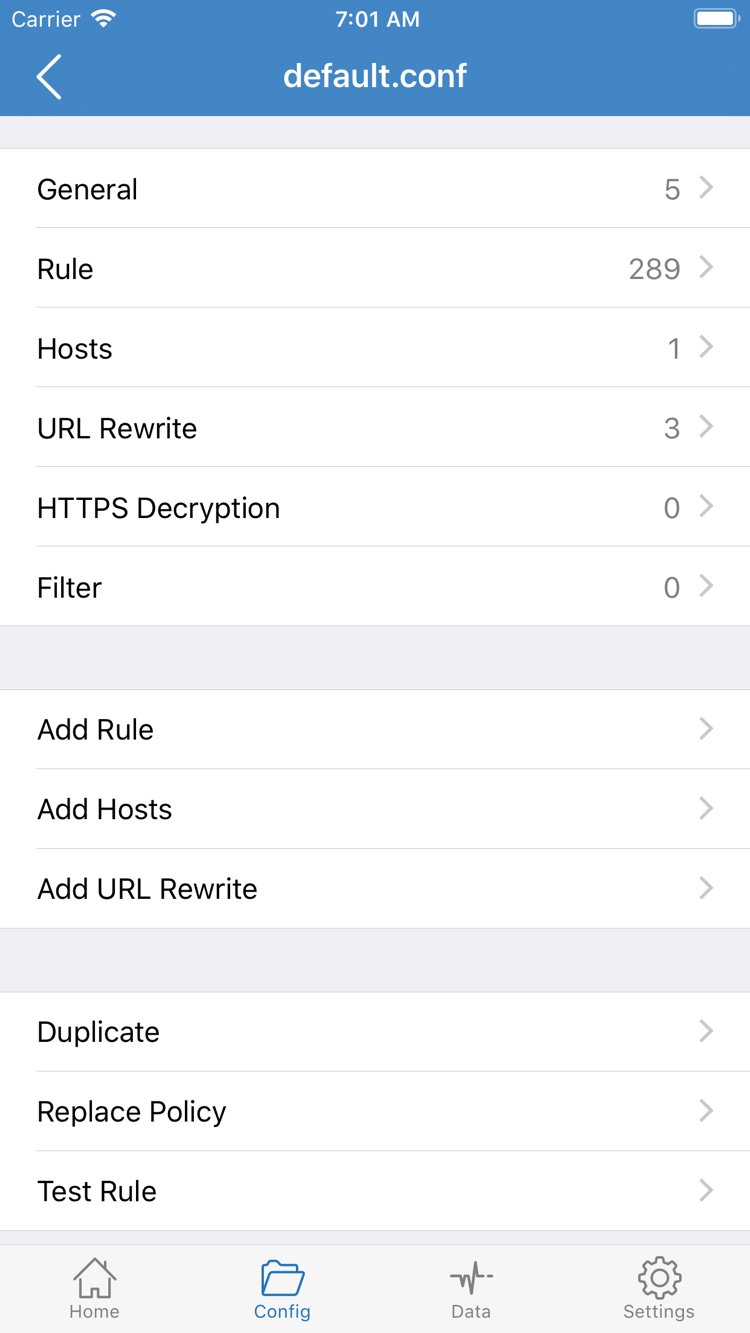
Config uses the rules in the current configuration file to determine where requests go. Open the Config tab at the bottom and confirm that the required file has been imported and selected. A file saved in the list is not necessarily the active configuration. Open a configuration file to see sections such as General, Rule, Hosts, URL Rewrite, and HTTPS Decryption. When getting started, just confirm that the file and its rule sources suit your needs; do not enable every advanced feature at once simply to get connected.
Rules in Rule are generally evaluated in order, so the placement of specific conditions and fallback conditions affects the outcome. PROXY, DIRECT, and REJECT are routing actions, not server names. For example, DOMAIN-SUFFIX,example.com,PROXY means that a matching domain suffix uses the proxy policy, while FINAL,DIRECT sends requests that did not match earlier rules to DIRECT. The domain here is only an example of the syntax; you do not need to add it to your configuration. If you use an existing configuration, leave its rules unchanged at first and check actual matches in the request records.
Proxy and Direct: Use them for comparison
Proxy can help check whether the proxy connection to the selected server works, separating server issues from routing issues in Config. Direct sends requests directly and is useful for checking whether the current network itself works; choosing Direct does not verify the proxy server. Do not conflate the results of the three modes: access working in Proxy does not prove that the rule order in Config is correct, and opening a webpage in Direct does not show that a server in the subscription is usable.
First, verify the connection once using the mode you need. If the issue occurs only in Config, check the active file, relevant rules, and actual matched policy rather than deleting the entire configuration. For the meaning and selection of protocol fields, see the protocol reference. For specific questions about rules, see the FAQ. This page focuses on the steps needed for a first connection.
Before continuing: You know which Global Routing mode is selected. If using Config, you have confirmed the active configuration file.
Home: Select a Server and Connect
Select an entry, turn on the switch at the top, then check system permission and connection status.
Return to Home and select the server you plan to use from the SERVER list. Make sure the selected item is a specific server, not just an expanded subscription group. For the first test, stick with the same server. If you change modes and switch entries at the same time, you will not be able to tell which change affected the result. If the list is long, identify the entry by the name you saved; similar names do not mean the server details are the same.
After confirming Global Routing, turn on the connection switch near Not Connected at the top of Home. The first time you connect, the system may ask permission to add a VPN configuration. This system authorization is required for the app to handle network traffic on the device. Confirm that the prompt was triggered by your current action, then allow it and complete any device verification required by the system. If you deny permission, the server entry remains in the list, but the connection may not proceed. Retry and check the VPN configuration status in the system settings.
Return to Shadowrocket and check whether the status at the top changes from Not Connected and the switch stays on. A system VPN indicator can help confirm that the configuration is enabled, but it does not by itself prove that a destination website is reachable. Do not repeatedly toggle the connection just because the indicator has appeared, and avoid switching servers continuously while the status is still settling. If the switch turns off immediately or the connection cannot be established, keep the current parameters and go to the troubleshooting section to distinguish an authorization issue from a server connection issue.
Also check whether another VPN connection is already using the device's system network tunnel. If needed, disconnect the other connection before returning to Home to try again. If On Demand was enabled earlier, its conditions may reconnect after a manual disconnect, making it seem as though the switch is unresponsive. During troubleshooting, note the original setting and temporarily disable the relevant automatic trigger. Restore it after you have verified the manual connection.
After connecting, do not adjust the configuration file yet. Run Connectivity Test and check actual access using the same server and mode to produce comparable results. Saving an entry, selecting it, and turning on the connection are three different actions. If any one is missed, a server may appear in the list without actually being used.
Before continuing: The selected server, routing mode, and connection status are all confirmed, and no other connection is interfering with the test.
Connectivity Test: Verify Connection and Rule Results
Check for a test response, webpage access, and expected routing separately. Do not rely on a single result.
Run a test, then check actual requests
Tap Connectivity Test in Home and wait for the current test to finish. The result shows connectivity for the selected test method; it does not mean that every app, domain, and transport method is working. To compare two results, keep the Test Method and network environment the same. Different test methods have different meanings, so their values should not be compared directly. Do not rely on a single test result to judge long-term server performance.
Then open a browser and visit the page you want to check. Reload it if needed. A page that was already open is not reliable evidence because its content may be cached. You can check a request expected to use DIRECT and another expected to use PROXY to see whether they match the configuration's intent. Choose destinations you actually need to access. If one is temporarily unavailable, compare with another to rule out an issue with the destination itself.
Compare the actual policy in Data
Return to the app and view the available request records in Data. Find the domain you just visited and use the displayed rule or policy information to see whether the request went through PROXY, DIRECT, or REJECT. If the expected record is missing, first confirm that the app is still connected, that the page triggered a new request, and that the record range you are viewing is correct. Display details may vary between versions, so use the fields visible in your current interface. Do not assume a network problem just because a particular field is not shown.
If the request went through DIRECT when you expected PROXY, first check whether Global Routing is still set to Config and why the current rule matched DIRECT. Conversely, if the request went through PROXY but still cannot access the destination, check the selected server, relevant transport parameters, or destination reachability rather than repeatedly adding the same domain rule. Narrowing down whether the expected policy was not matched or the connection failed after a match will make the next troubleshooting steps more focused.
Note the network, server name, Global Routing mode, and specific symptoms. There is no need to share your complete subscription or password. After testing, restore any temporary Proxy or Direct selection to the mode you need for everyday use, then check actual access again. This verifies both the connection and the settings you will keep, preventing you from leaving the app in a mode that does not suit your usual needs.
Success criteria: The connection switch stays on, actual requests complete, and requests that need routing match the expected policy.
Settings: Troubleshoot One Failure Point at a Time
Change one variable at a time and retest before proceeding. Check details you can verify directly before considering advanced settings.
Subscription is empty or update fails
First check that the complete subscription was pasted into the address field for Subscribe and that the current network can retrieve it. A failed update for an existing server and an empty list immediately after import are different situations. In the first case, keep the existing entries and configuration; in the second, focus on the address and subscription format. Do not repeatedly add the same subscription to trigger an update, and do not delete everything before making a backup. If necessary, check the subscription status with your service provider, but do not post the complete address in a public discussion.
Connection switch will not stay on
Check whether you granted VPN permission the first time, then review the VPN configuration in the device settings and any other active connections. If a system prompt appears, read its details instead of repeating the action. Incorrect server parameters can also cause connection failures. Return to the relevant entry's edit screen in Add Server and compare Type, Host, Port, and authentication fields one by one. Similar server names, matching domain names, and a successfully saved form do not replace checking the parameters.
Connected, but webpages will not open
First check whether the current Wi-Fi or cellular network works, then compare the results in Proxy and Config. If Proxy works but Config does not, check the active configuration file and rule matches. If both fail, check the server details and availability first. If only a few domains fail, review DNS and the destination request in Data rather than immediately changing all DNS settings. To understand protocol fields in more detail, go to the protocol reference and read about the Type you use. Avoid repeatedly changing unrelated fields.
Test fails, or the connection returns after disconnecting
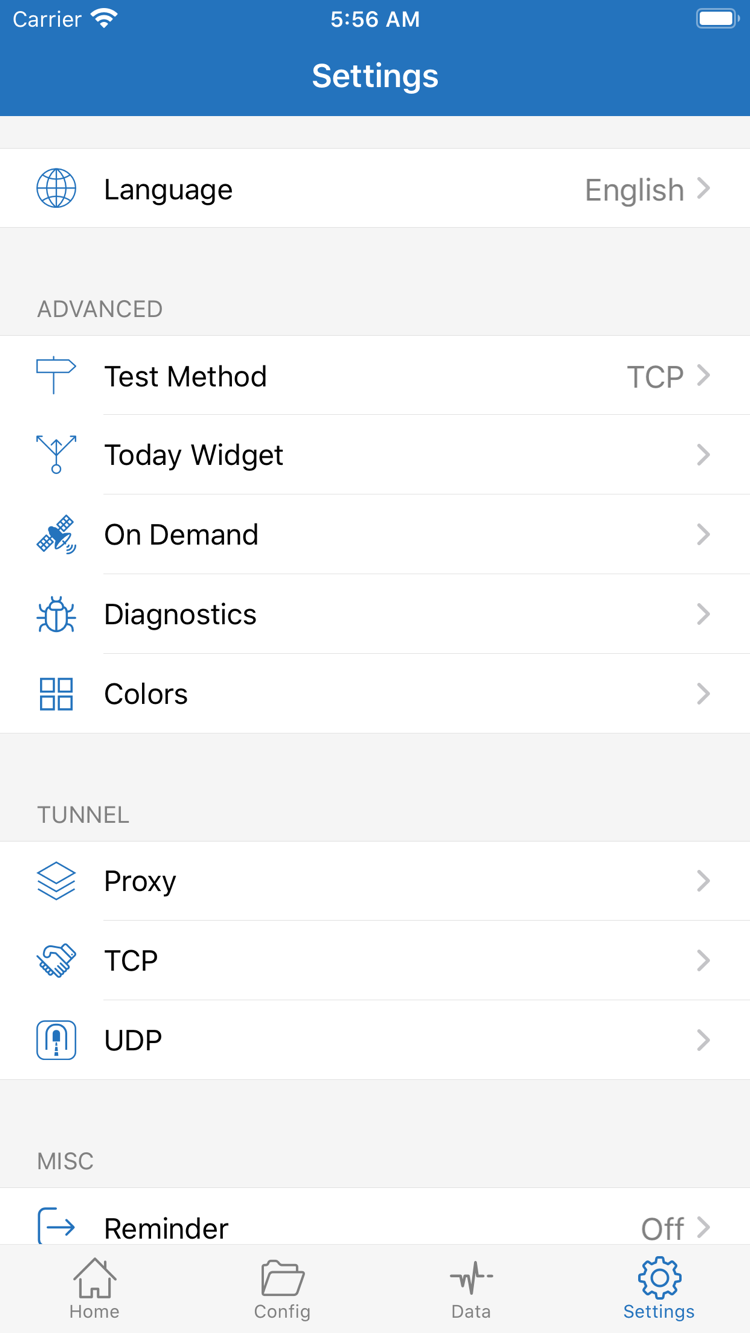
In Settings, check Test Method and confirm which method is selected, then return to Home and run Connectivity Test again. If the test responds but webpages fail, continue troubleshooting with actual requests. If the test fails but webpages load, distinguish the test destination and method before concluding that the entire connection is unavailable. If the connection changes automatically after switching networks, check the On Demand conditions and their order. Temporarily disable the relevant conditions for a manual comparison, then restore the automatic connection settings you need.
Diagnostics in Settings can help investigate further, but diagnostic output may contain domains, addresses, or configuration details. Review and remove sensitive information before sharing it. Do not change multiple groups of settings such as Proxy, TCP, and UDP at once. Keep the original values and make a corresponding adjustment only after identifying the specific symptom. You do not need to enable HTTPS Decryption or install a certificate for ordinary connection checks; doing so adds unnecessary variables to the initial setup.
If the issue persists, record four details: the step where it fails, the mode in use, the current network type, and the separate results of the test and actual browsing. Then see the FAQ sections on importing, rules, and troubleshooting. These details are more useful than simply saying that it does not work: they help distinguish configuration, system authorization, network, and server issues, while avoiding unnecessary reinstallation and repeated imports.